(5)分离拨叉与轴
第一步:转动DT-51230上的拨叉锁扣至解锁位置(如69所示)。

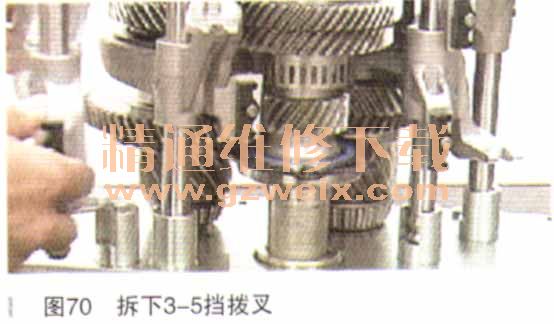
第二步:拆下3-5挡拨叉(如图70所示)。
第三步,用同样的方法拆下4-2倒挡拨叉、1-7挡拨叉和2-6挡拨叉。
第四步:从DT-51230上依次取下输出轴总成、上输出轴总成和输入轴总成(如图71所示)。

(6)拆卸轴承外圈
第一步:安装轴承外圈拉拔工具DT-50170(如图72所示)。

第二步:拧紧专用上具中心螺母,将其固定在轴承外圈上(如图73所示)。

第三步:安装DT-45124(如图74所示)。

第四步:拧紧DT-45124下方螺栓,将轴承座拉出(如图75所示)。

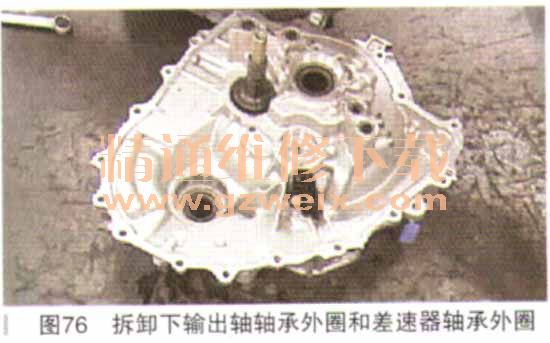
第五步:使用DT-50711和DT-50712拆下下输出轴轴承外圈和差速器轴承外圈(如图76所示)。
(7)测量轴承预紧度
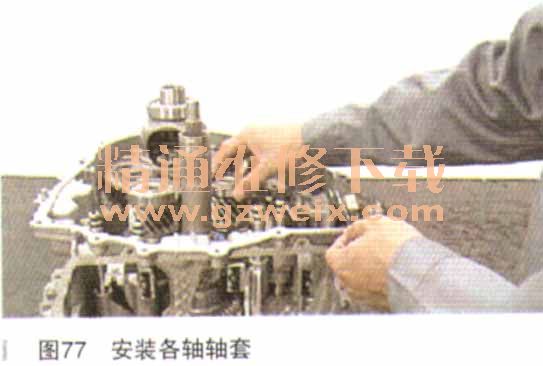
第一步:依次安装上输出轴、下输出轴、差速器轴的轴承外圈(如图77所示)。
第二步:在上输出轴、下输出轴、差速器轴的轴承外圈上安装轴承紧度测量套筒DT51325-1、DT51325-2、DT51325-3(如图78所示)。

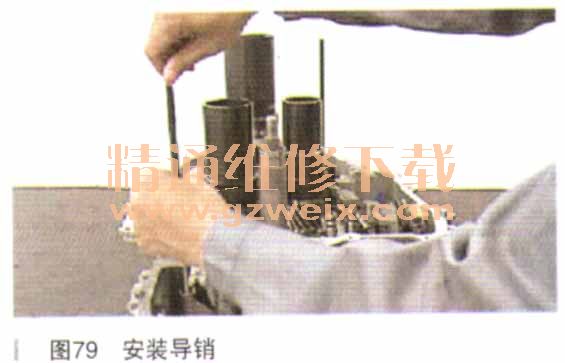
第三步:在变速器超额分配对角方向上安装两个导销DT-51325-5(如图79所示)。
上一页 [1] [2] [3] [4]
")
")
")
")

