六、安装控制设备,铺设和连接加装电缆
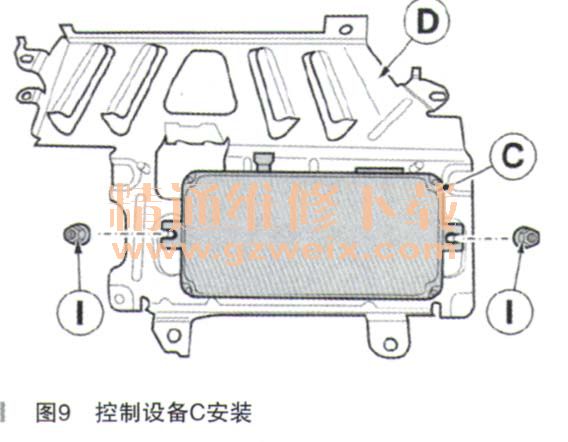
如车内已安装控制设备支架D,则不再需要该支架。将控制设备C安装在控制设备支架D上,并用六角螺母I拧紧,如图9所示。
把埋头螺母F从左后侧侧板的预设位置上推开,如图10所示。

将支路A1和B2插接在控制设备C上,将控制设备支架D用六角螺栓J插接在侧板上,如图11所示。

将支路A2铺设在接地支撑点Z10*13B上并拧紧,如图12所示。

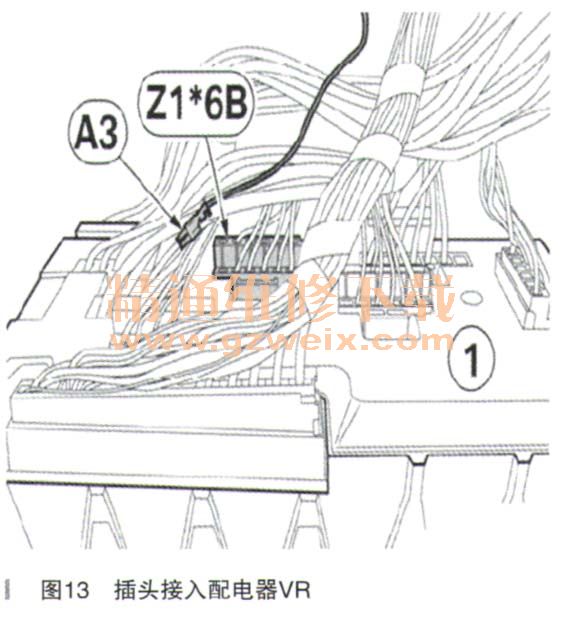
在把插头接入配电器VR (1)时,熔丝可能脱出。注意要把所有熔丝再次安放至正确位置。将支路A3铺设在配电器VR (1)的安装地点上,将支路A3接入插头Z1*6B的插脚2内,6极插孔外壳GR内,如图13所示。
熔丝L要安装在配电器VR(1)的插槽F47内,如图14所示。

上一页 [1] [2] [3] [4] [5] 下一页


