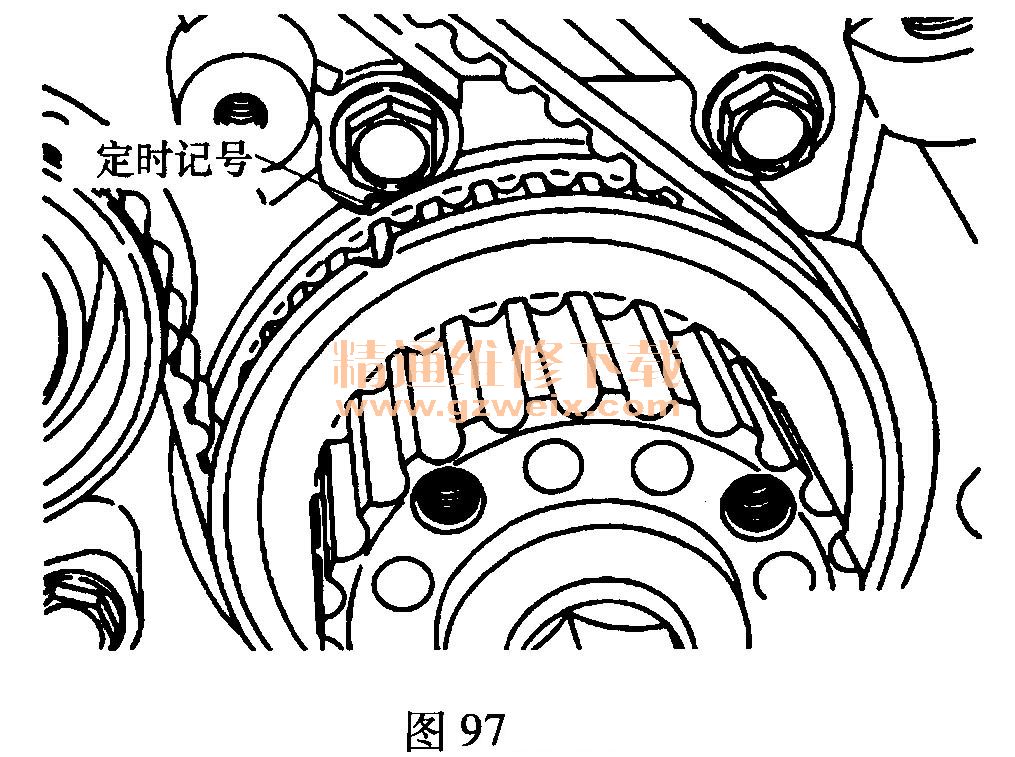
(5)使曲轴链轮上的定时记号与前壳上的记号对齐,如图97所示。
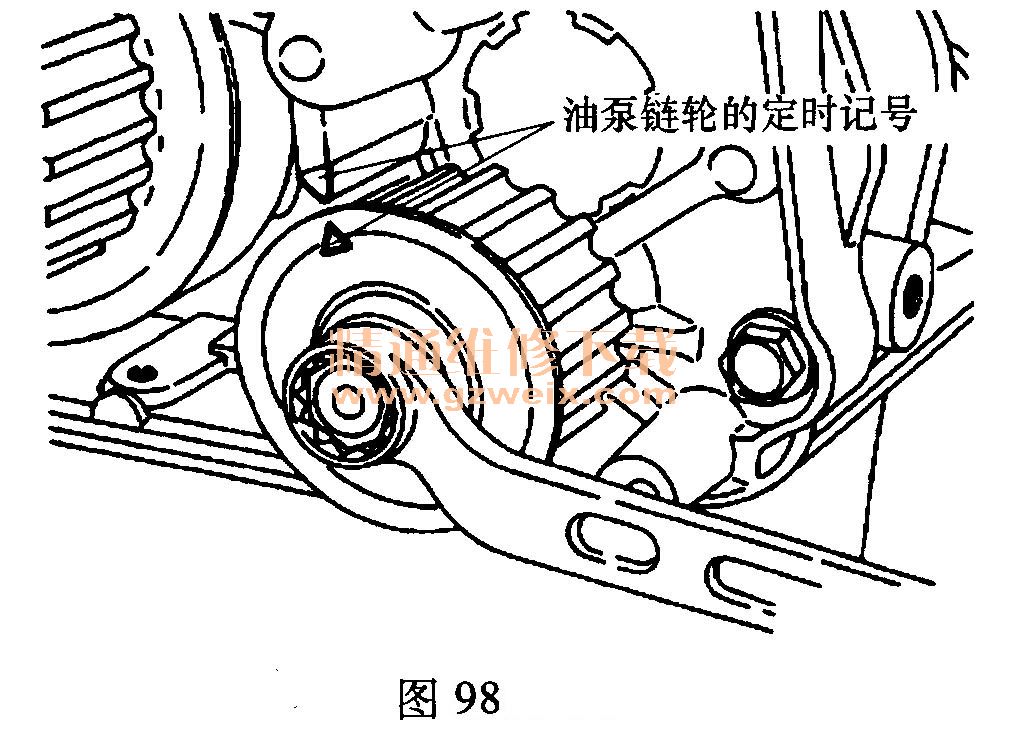
(6)使油泵链轮上的定时记号对齐如图98所示。
(7)安装正时带。
(8)向图99中箭头所示方向举起张紧器带轮,然后拧紧中心螺栓。

(9)确认所有定时记号均对齐。
(10)安装曲轴旋塞。
(11)逆时针方向将曲轴旋转1/4圈。然后顺时针方向旋转,直到所有定时记号再次对齐为止。
(12)如图100所示,用专用套筒扳手和扭力扳手拧松张紧器带轮中心螺栓。
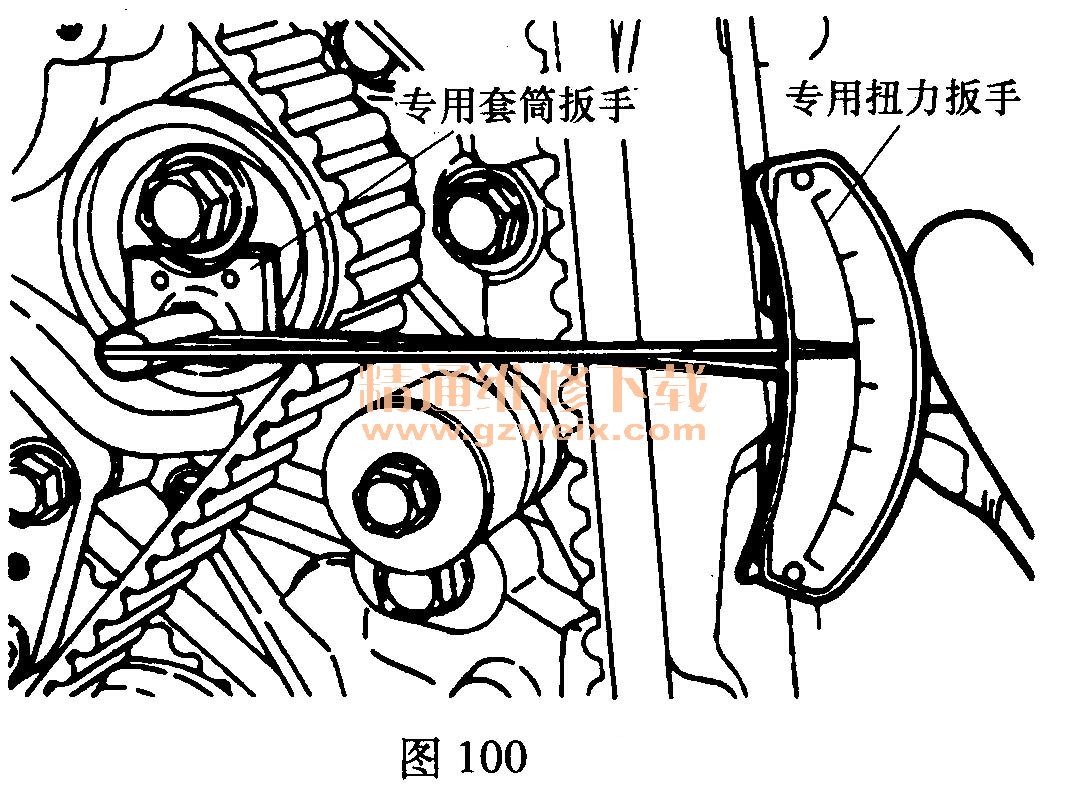
注意:如果不能利用专用工具时,可使用能测量0~5N·m力矩的一般的扭力扳手。
(13)利用扭力扳手拧紧到3. 6N·m。
(14)一面利用专用工具和扭力扳手保持张紧器带轮,一面拧紧中心螺栓至标准值。
(15)顺时针方向将曲轴旋转2圈后,放置约15min。然后,检查自动张紧器的固定钢丝能否自由滑动,如图101所示。
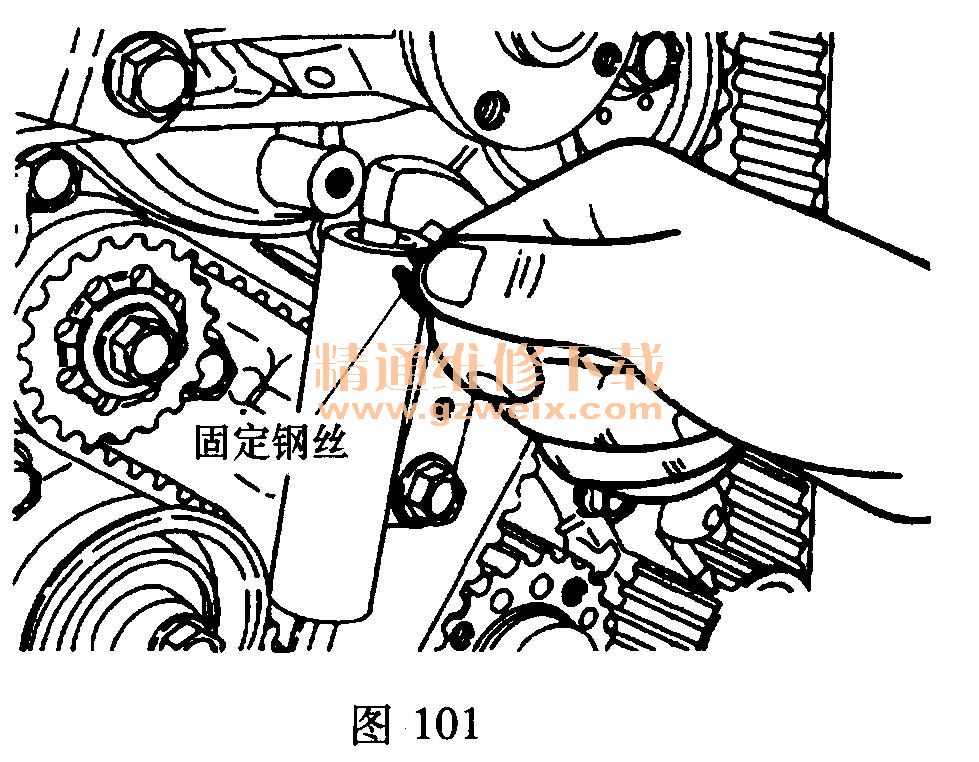
注意:钢丝若不能自由滑动,反复进行上述步骤(11),直到钢丝滑动为止。
(16)取下自动张紧器固定钢丝。
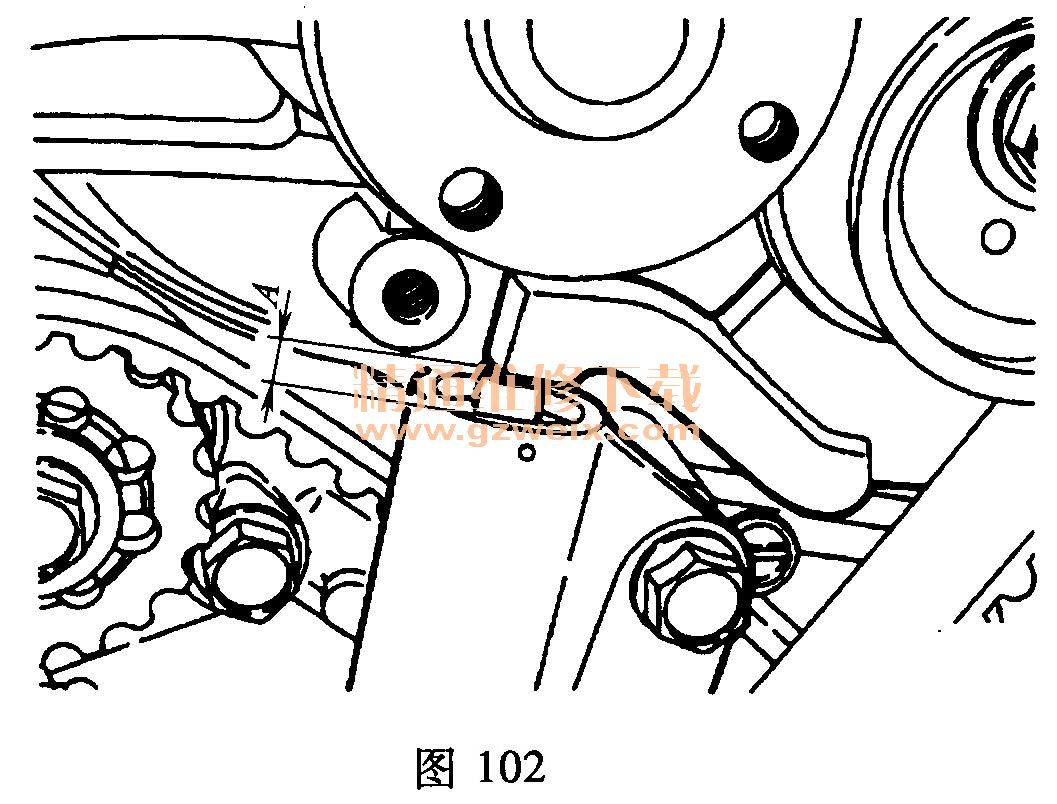
(17)测量图102所示的距离A(张紧器臂与自动张紧器本体间的距离),标准值为3.8~4. 5mm。
上一页 [1] [2]


")
